|
||||
| NHeat physics tutorial | ||||
|
This is a step-by-step tutorial about Nascar Heat physics It is intended to be a guideline for setting up physics while implementing a new car model to NHeat. The order it treats the different aspects of NHeat physics supports the implementing process. This tutorial does not claim to be the one and only truth about NHeat physics, but it is coherent, and it works! If you nonetheless stumble along any NHeat physics phenomenon that you think is opposite to what information you have found here - feel free to point it out on the forum for discussion There's just one file for each car that has all the physics information - physics.val. It's compiled from a text file like the one you can find here. All the Physics Tutorial chapters are about parameters that are in physics.val There's some - few - parameters that are not explained here. Guesses about those parameters' usage can be found on the commented example physics table nonetheless. This way this tutorial is an almost complete guide to NHeat physics.
|
||||
| Modding NHeat - Physics/Dimensions | |||||||||||||||||||||||||||
|
First thing you have to do on physics when you put a car to NHeat is going for those values that cause visible changes on the car's appearence in the game. These are
First of all you'll have to put some tires to your car and this is done by pointing to some tire 3D model, that has to be located in part.res. Each tire model actually is a set of files
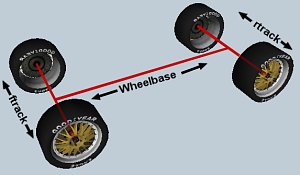
You'll want tires to be placed in the correct position at the car, so you either have to adjust the car's body 3D model wheelbase to the wheelbase value in physics (recommended) or vice versa. Typically you'll try to get info what wheelbase the real life counterpart of your simulated car has, put physics value to that size and carefully adjust the 3D model to this.
To put the model's body to the right place, there's 2 options:
|
|||||||||||||||||||||||||||
| Modding NHeat - Physics/Driver's view | ||||||||||||||||
|
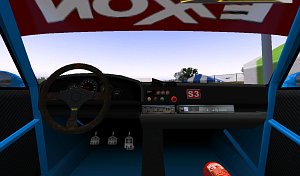
Next thing to close in to would be all those attributes that affect cockpit view (F1) in the game.
head_pos is a x,y,z-value, where first number is left/right, second number is height and 3rd number is positioning the driver's head along length axis of the car.
head_pitch sets the angle of the driver's view.
|
||||||||||||||||
| Modding NHeat - Physics/Gauges | |||||||||||||||||||||||||||||||||
|
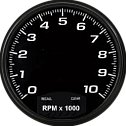
There's quite some gauge parameters in Heat physics optionally to be set, and they all work the same way. There's 7 gauges that can be used:
Each dummy helper's center has to be positioned to where the referring gauge's needle center is intended to be located. The dummy helper must have the same name as the gauge physics it refers to. The oil_pressure_gauge dummy helper object for example has to be named
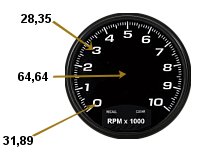
Now you need to adjust the needle movement to the gauge that you have put in.
Take care on the order of values. You cannot jump from tachometer2 to tachometer4 for example. There's one restriction to the needle's movement: the starting value cannot be below and to the right of the needle's center Every gauge setting works like described for tachometer. You don't need to have any gauges at all, nor do you need to put any gauge settings at all to physics; they are all optional.
|
|||||||||||||||||||||||||||||||||


